
Green beans turn into a crunchy, tangy snack with this dilly beans recipe. These delicious quick pickles are flavored with fresh dill, garlic, and mustard seeds. (No sugar needed!)
Add these green bean refrigerator pickles to snack boards, serve them alongside sandwiches, or nosh on them right out of the jar.
I’m a green bean fan from way back. Since childhood, it’s been one of my favorite vegetables.
So it was only a matter of time until I paired green beans with my favorite preserving method – quick pickling. It gives tender green beans a tangy, garlicky bite and addictive crunch.
These mouthwatering dilly beans come together fast. They’re a great way to use up any extra green beans from your garden, farmers market run, CSA share, or sale at the supermarket.
Enjoy dilly beans as a snack, use them as a garnish in a Bloody Mary cocktail, serve them alongside a sandwich, or add them to your vegan charcuterie board for color and variety.
This recipe isn’t suitable for canning. Quick pickled green beans must be stored in the fridge.
In this post:
Ingredients
Here are the ingredients you will need to make this recipe.
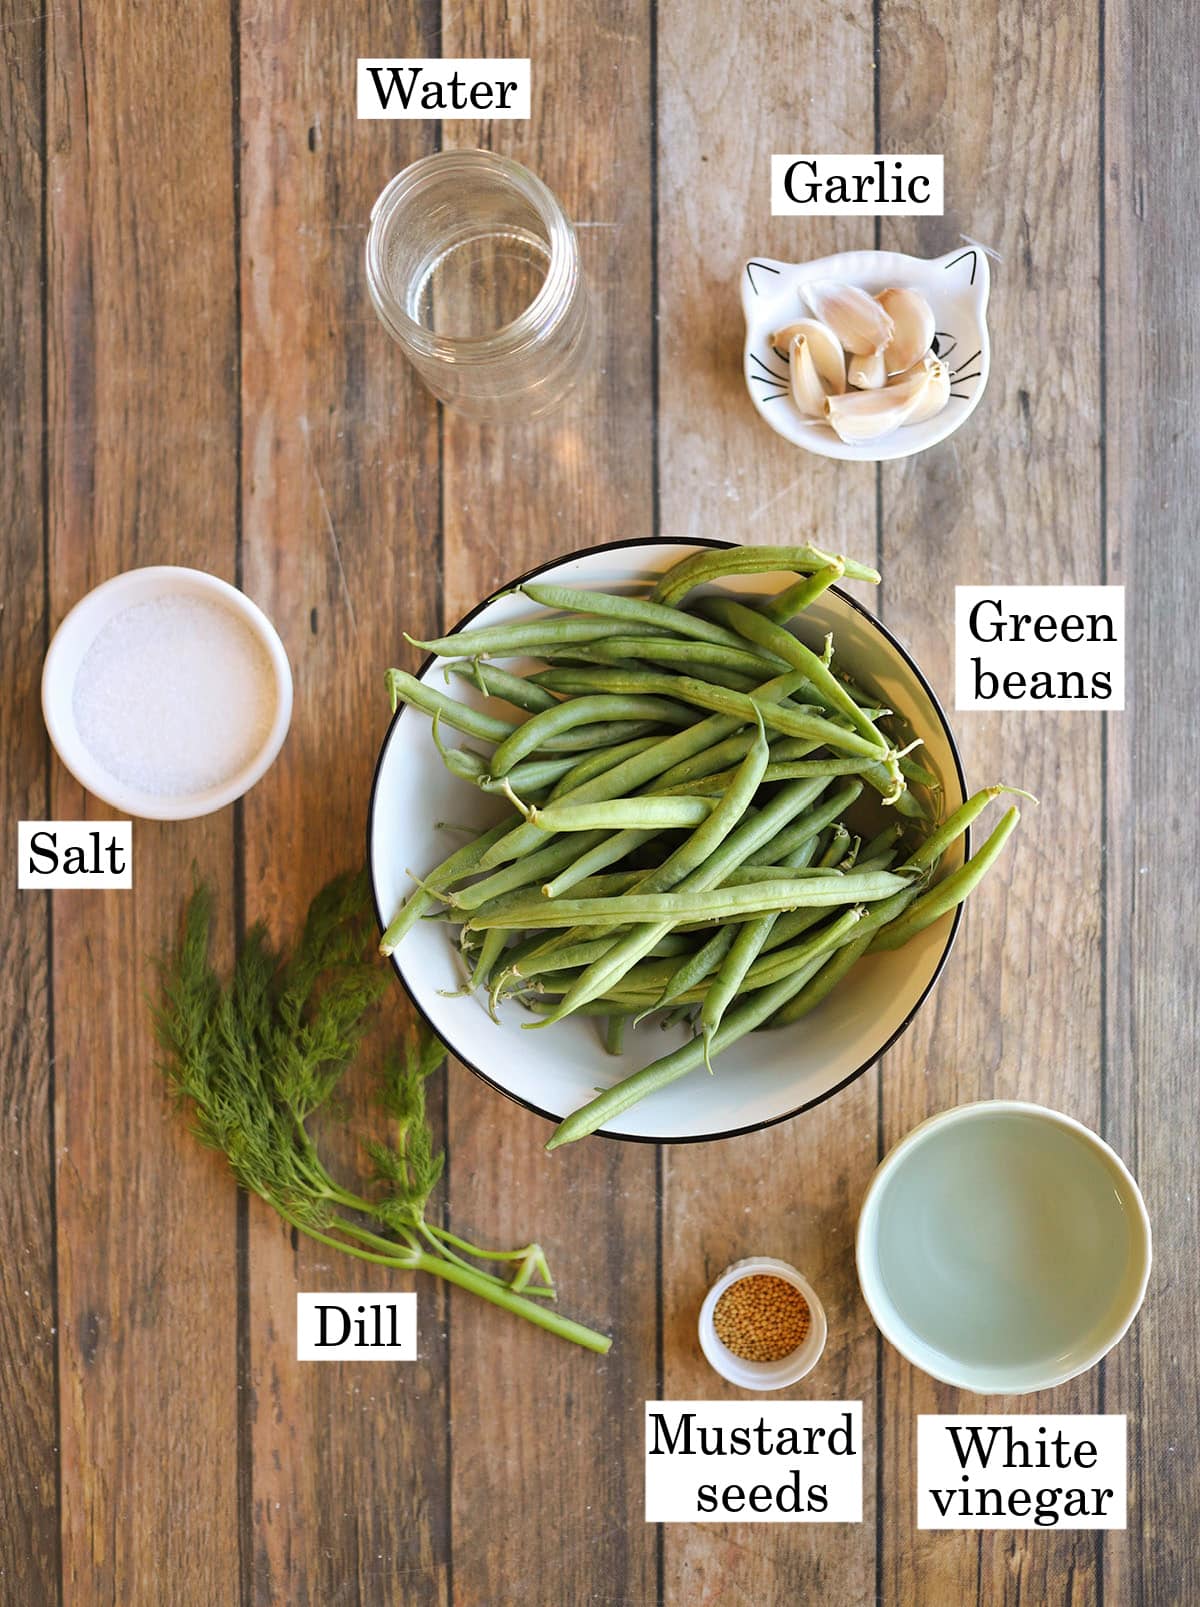
Salt: Choose kosher salt (preferred) or non-iodized sea salt. (Iodized table salt can make your brine cloudy, so I don’t recommend it for this recipe.)
Different salt brands vary in crystal size. So your brine may be slightly saltier or milder depending on what you use. That’s normal.
White vinegar: White vinegar provides acidity, which helps with preservation and crispness. It also gives the signature “pickle” flavor that people expect.
Because white vinegar is more neutral in flavor than some other types (like apple cider vinegar), it allows the garlic and dill to really shine.
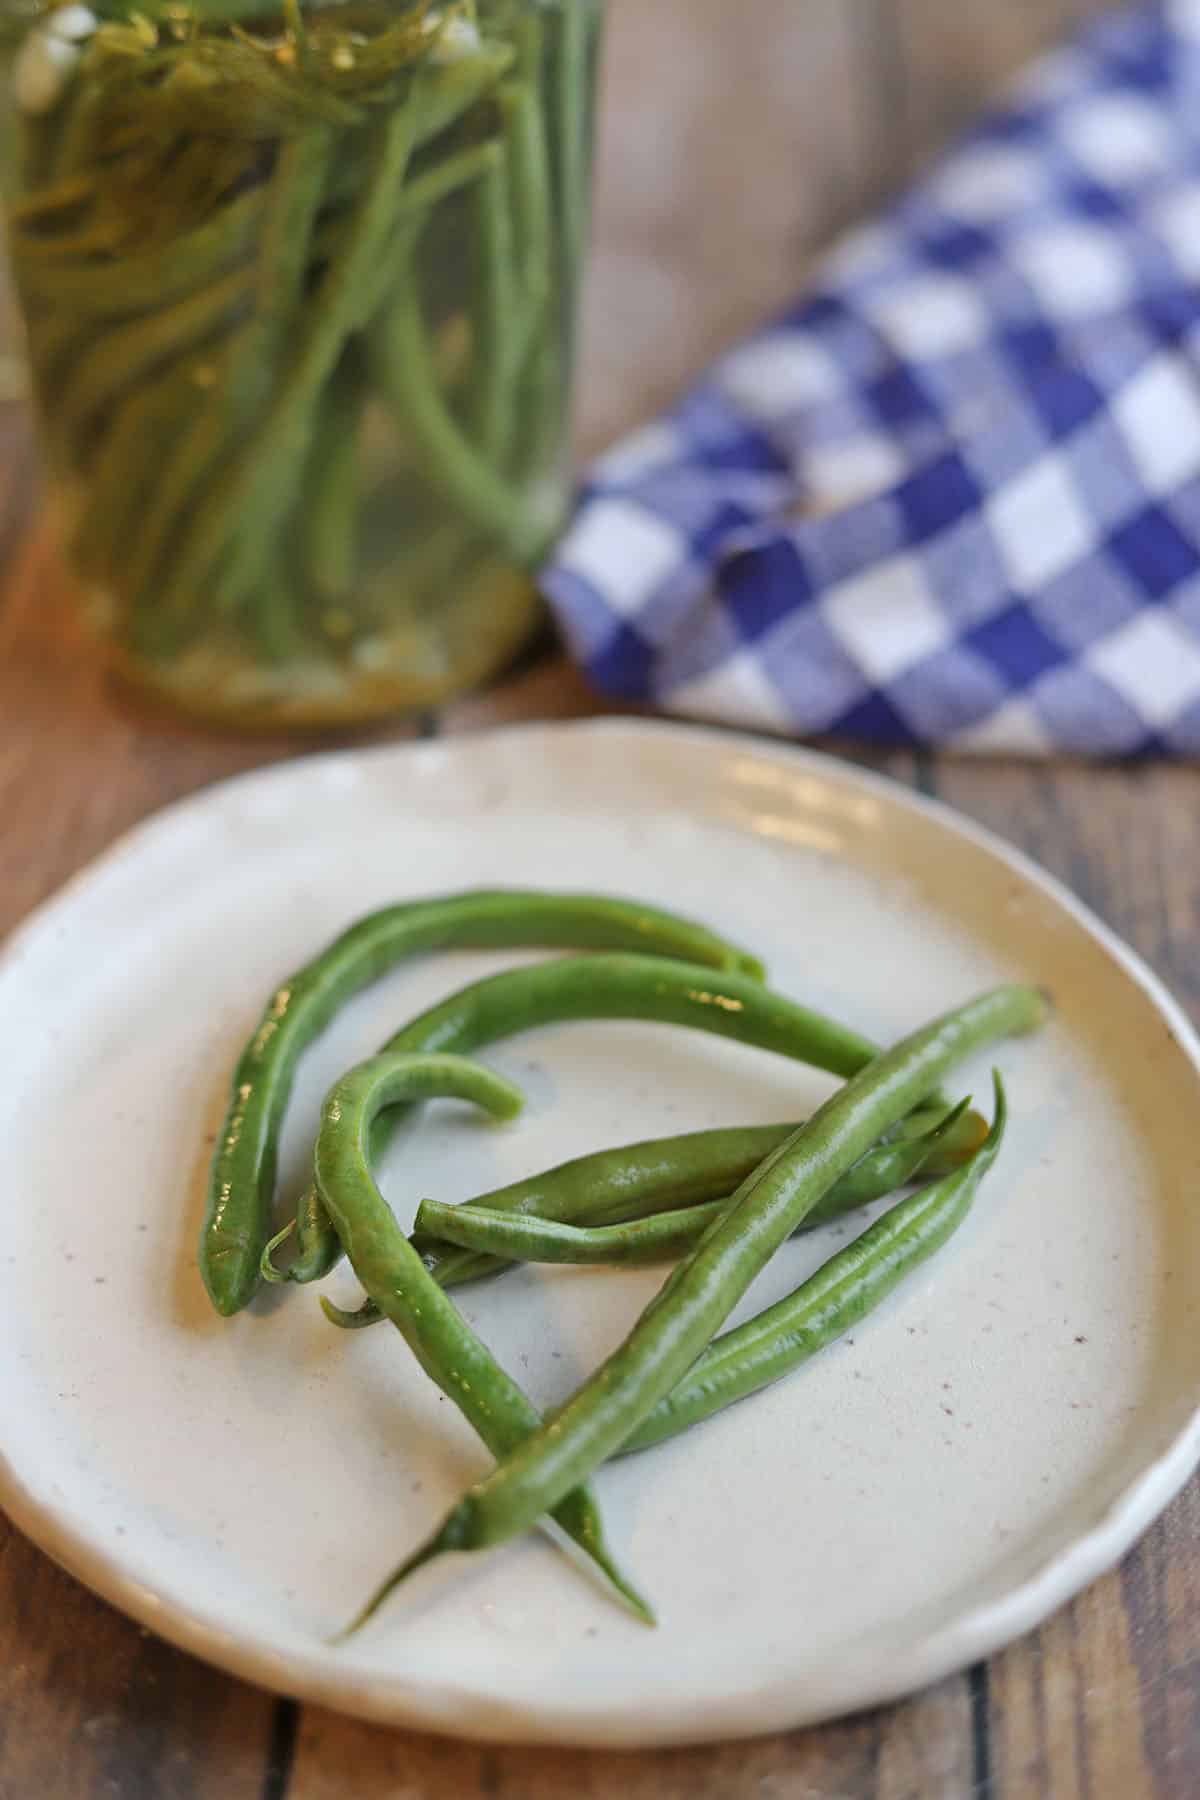
Green beans: Choose fresh, firm green beans that have a bright color and crisp texture. Both thick and thin beans work for quick pickling, but thinner ones will absorb flavor faster.
Aim for about 8 ounces, or enough to fill a 32-ounce mason jar standing straight up.
Garlic: Thinly sliced fresh garlic adds delicious bite.
Fresh dill sprigs: Obviously, for dilly beans, fresh dill fronds are a must.
Mustard seeds: Mustard seeds add subtle warmth and light tang.
How to make dilly beans
This section shows how to make this recipe at a glance with process photos of the steps. For complete ingredient amounts & instructions, keep scrolling to the recipe card below.
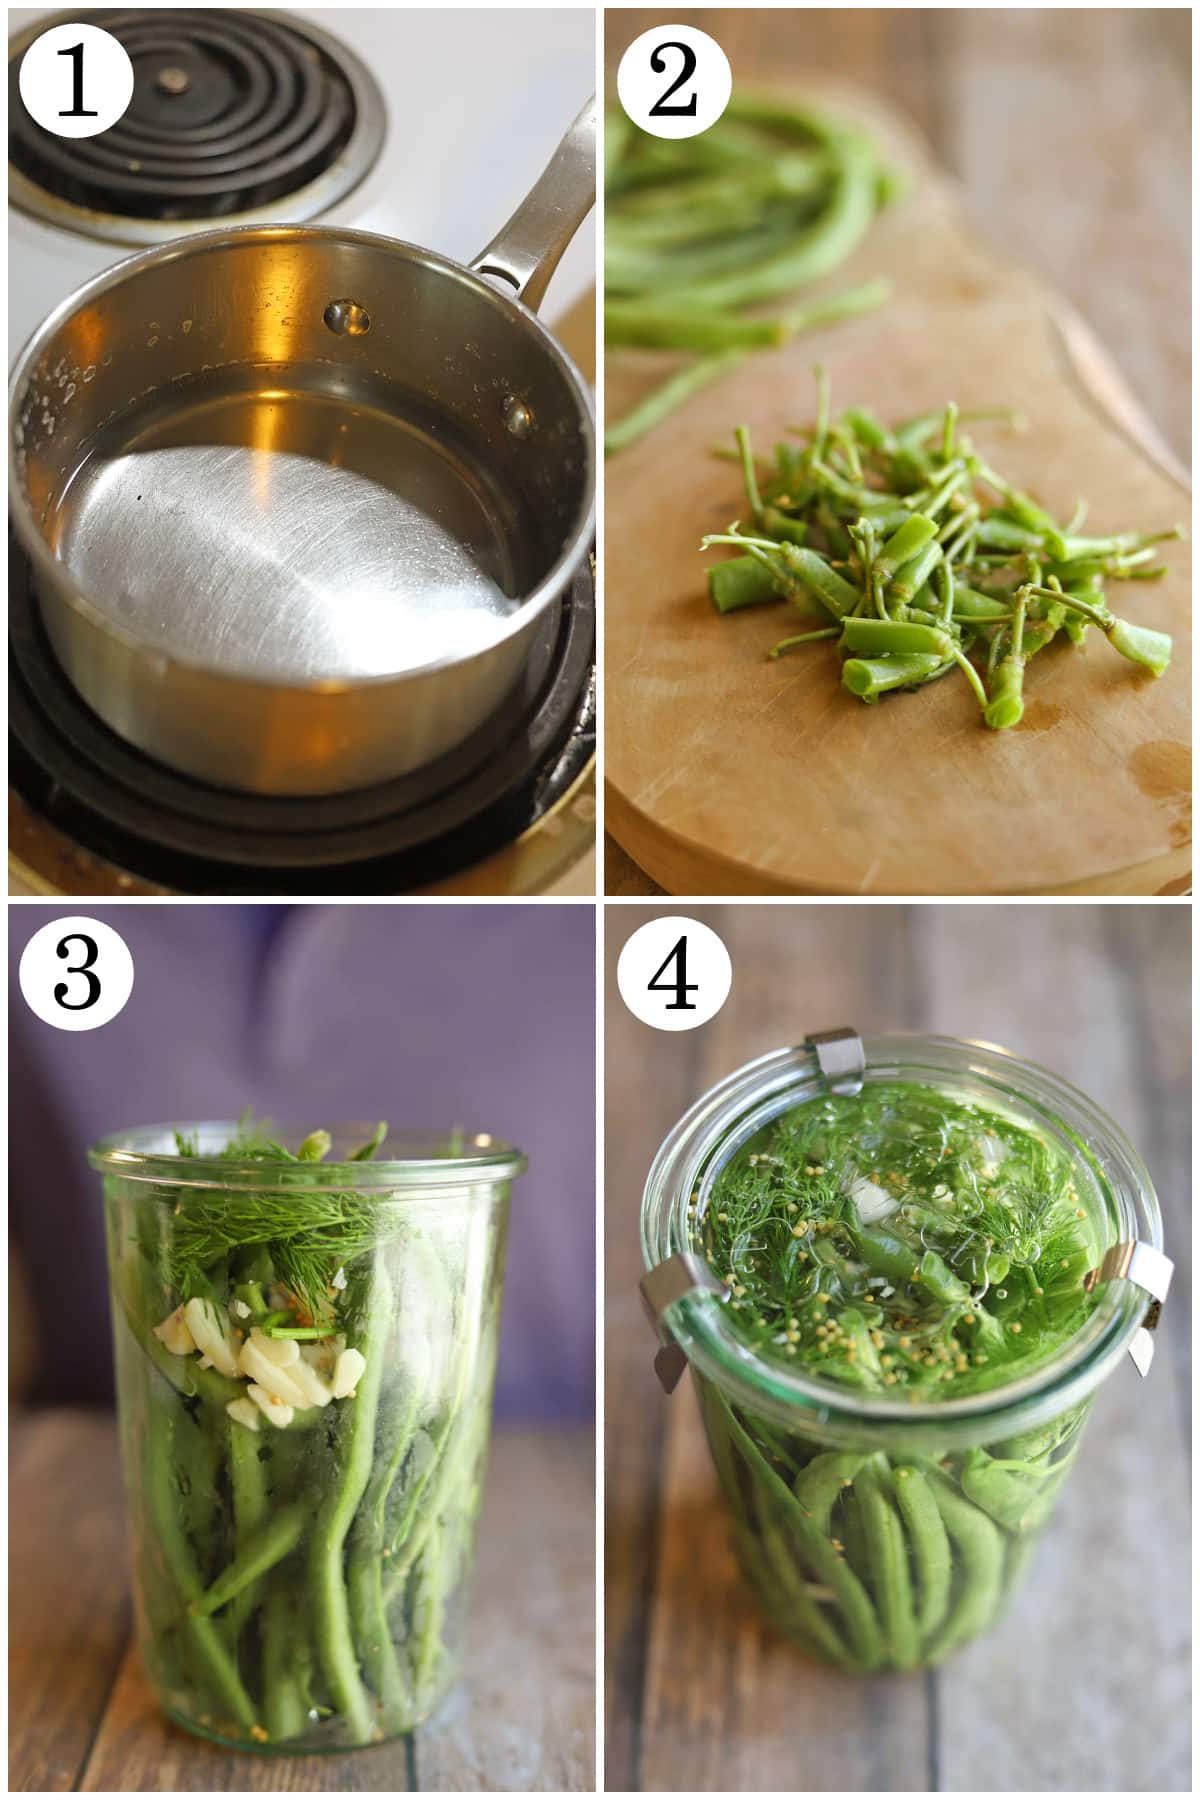
1. Combine water and salt in a small pot. Stir occasionally over medium heat until the salt dissolves. Turn off the heat, stir in white vinegar, and set aside to cool slightly.
2. Snap the stem ends off of fresh green beans.
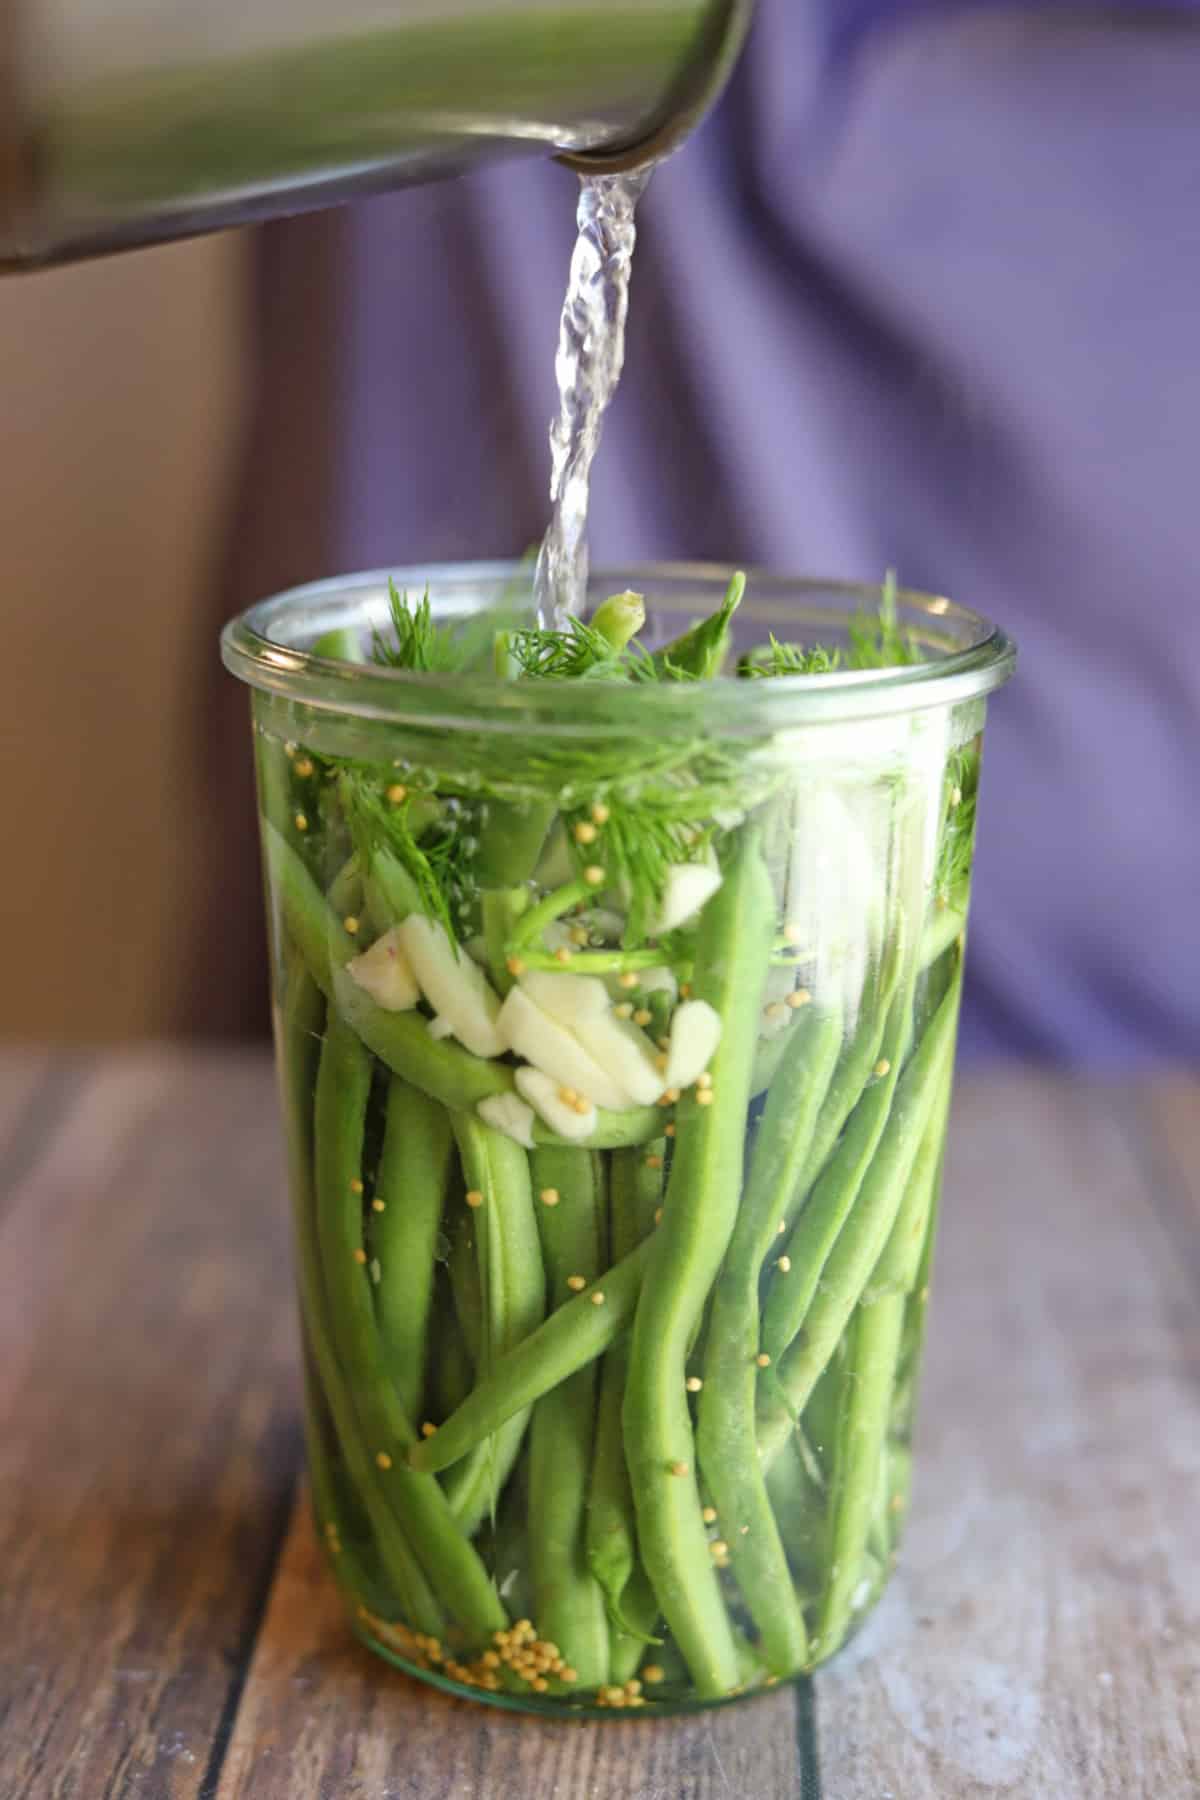
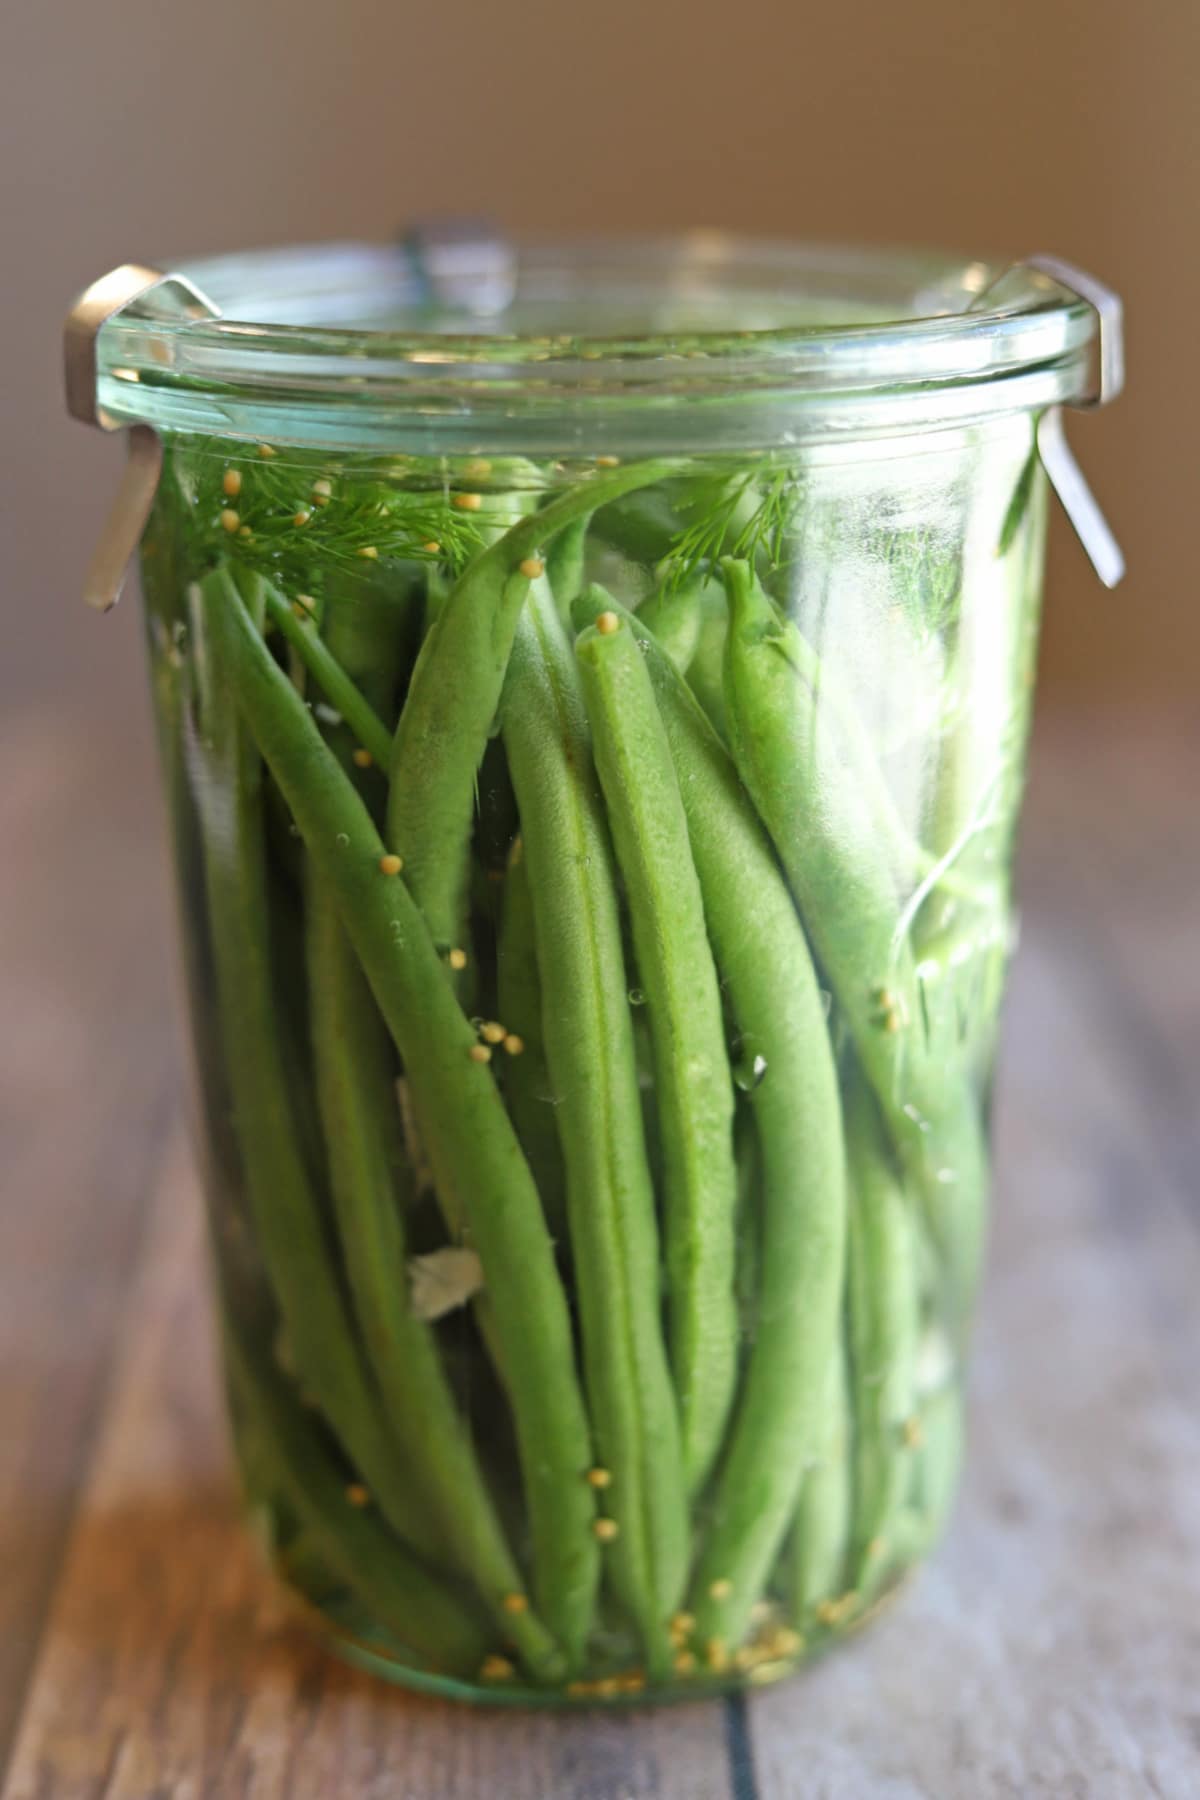
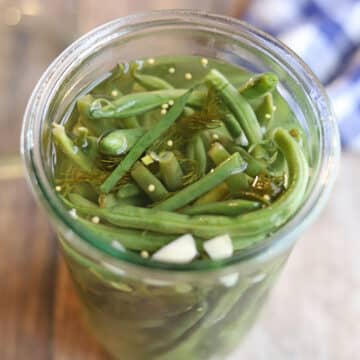
3. Grab the full bunch of green beans like a bouquet, and stand them inside of a clean glass jar. Add dill weed, sliced garlic, and mustard seeds.
4. Carefully pour the brine over the beans. Cover the jar with a lid, and cool to room temperature before refrigerating.
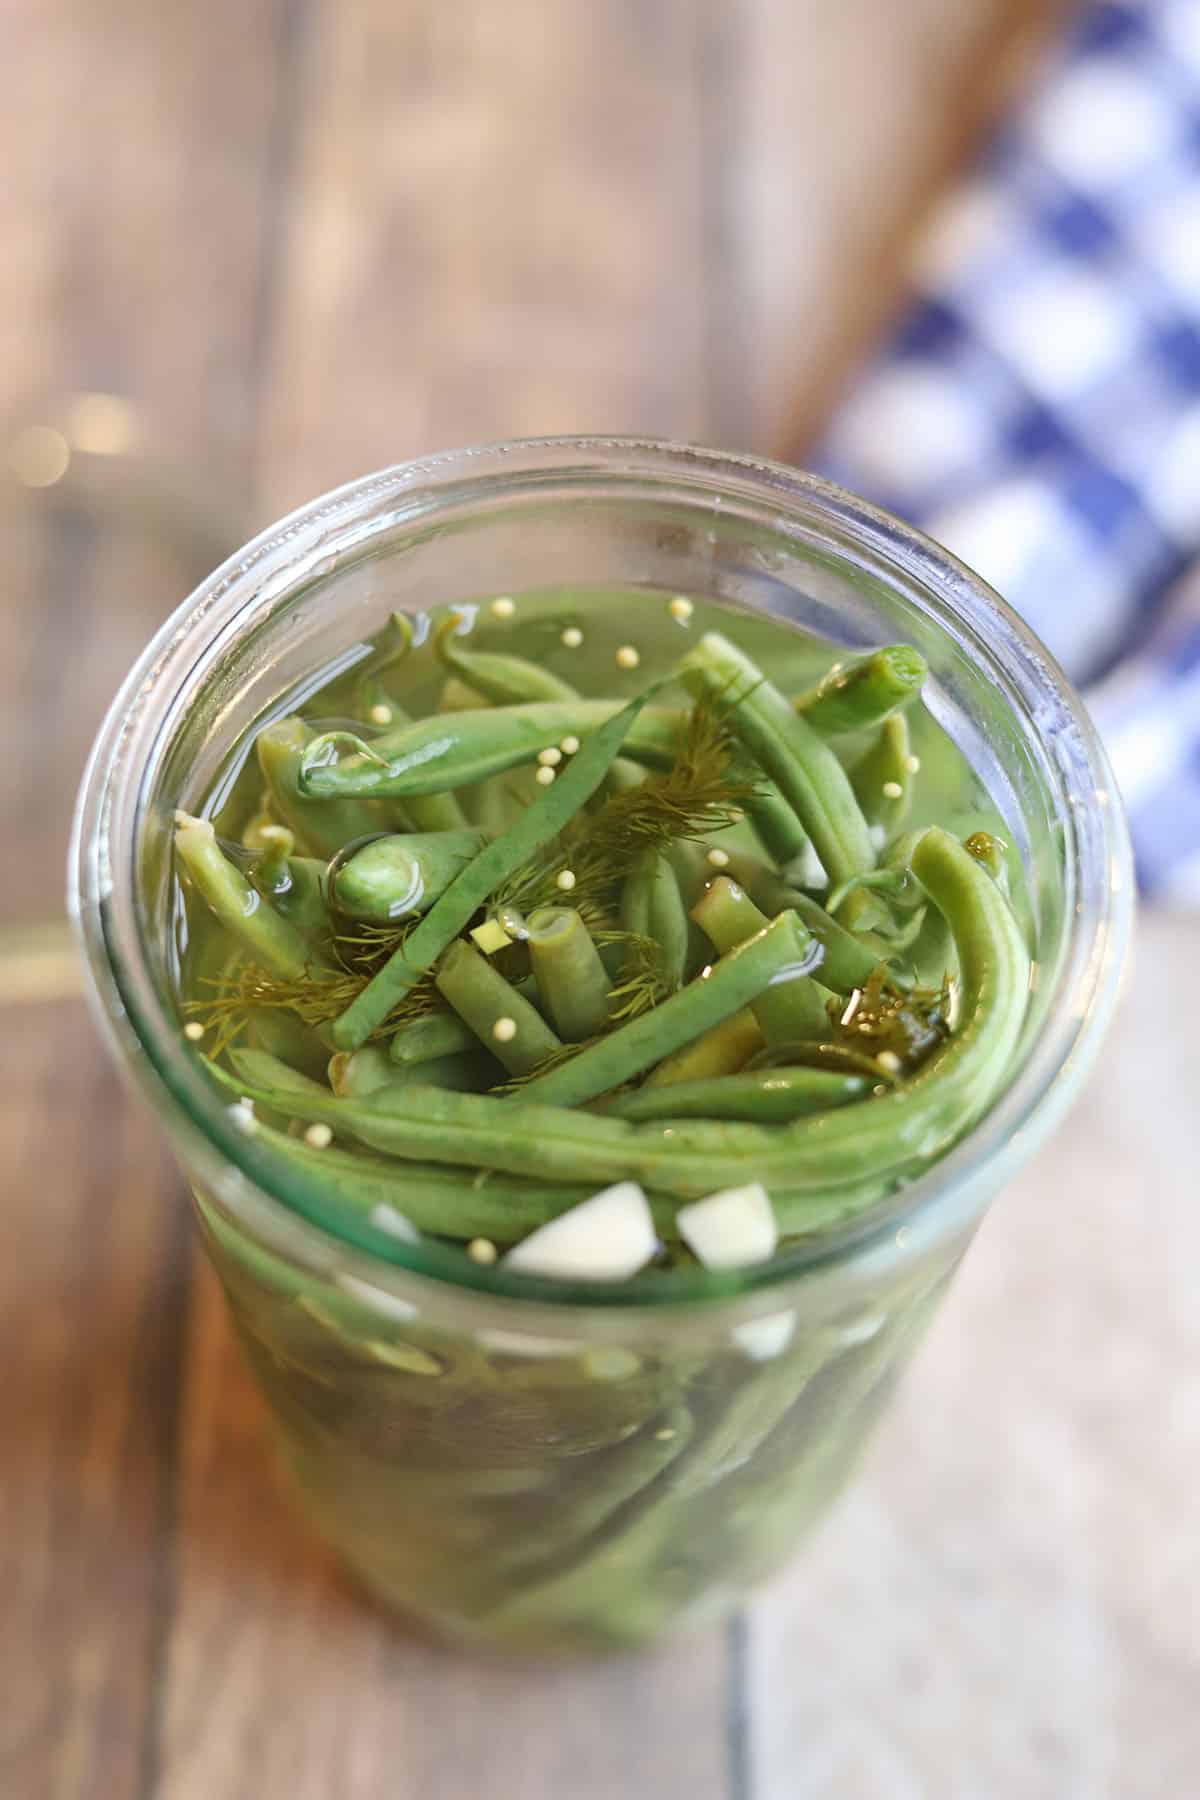
The dilly beans are ready to enjoy after about 24 hours, but the flavor gets even better after 2 or 3 days in the fridge.
Customize your green bean pickles
You can make this dilly beans recipe your own with any of these substitutions, variations, or additions.
Here are some ways to personalize this recipe:
- Vary the beans: Instead of standard green beans use yellow or purple green beans
- Include more add-ins like dill seeds, whole peppercorns, cumin seeds, fennel seeds, or coriander seeds
- To make spicy dilly beans, add red pepper flakes or sliced jalapeno
Ways to use green bean refrigerator pickles
Here are some of my favorite ways to use green bean quick pickles:
- Snack on them right out of the jar
- Add them to a vegan charcuterie board
- Use them as a garnish in a vegan bloody Mary
- Chop them up and add to dill potato salad or chickpea salad (in place of cucumber pickles)
- Use them for breaded green beans (instead of plain beans)
- Put them in your vegan chili dog instead of (or in addition to) a pickle plank
Storage instructions
Store jarred quick pickled green beans in the refrigerator. Make sure that they stay fully submerged in the pickling liquid.
For the best texture and flavor, enjoy them within a few weeks.
To make dilly beans last as long as possible, always use a clean fork when removing them from the jar.
More quick pickle recipes
FAQ
No. For quick pickles, you only need to warm the brine enough to dissolve the salt. The pickles are preserved by the vinegar and refrigeration, not by heat processing.
I don't recommend it. Iodized salt can make the brine cloudy and affect the color of the green beans. Plus, because table salt has finer grains than kosher salt, the pickles may turn out too salty.
No. This recipe is for refrigerator pickles only and isn't designed for shelf-stable canning. Store the dilly beans in the refrigerator and enjoy within a few weeks.
If you try this recipe and love it, let me know! Leave a comment and ⭐⭐⭐⭐⭐ rating in the comment section below. It truly makes my day and is such a help!
📖 Recipe
Dilly beans: Quick pickled green beans
Ingredients
- 1 ¼ cups water
- 1 ½ Tablespoons kosher salt or sea salt (not iodized)
- 1 cup white vinegar
- 8 ounces green beans stems snapped off
- 4 garlic cloves peeled & sliced thin
- 1 teaspoon mustard seeds
- 3 sprigs dill fresh
Instructions
- In a small pot, combine the water and salt. Warm over medium heat, stirring until the salt dissolves (about 2 to 3 minutes).
- Turn off the heat and stir in the white vinegar. Set aside to cool slightly.
- Grab the green beans in one large bunch in your hands (like a bouquet). Then stick them into a clean jar. Add the sliced garlic, mustard seeds, and fresh dill.
- Carefully pour the brine into the jar. If the green beans aren't totally submerged, gently press them down with a fork or simply wait a day or so. They will soften slightly and settle into the liquid as they pickle.* Cover the jar with a lid. Let the jar cool to room temperature, then transfer to the refrigerator.
- The pickled green beans will taste best after at least 24 hours. Store in the refrigerator, and enjoy within a few weeks.


Leave a Reply