
If you love the delicious, rich flavor of peanuts, you’ve got to try homemade peanut milk! This wonderfully creamy, 4-ingredient, plant-based milk tastes like everything you adore about peanut butter but in a drinkable form.
Enjoy vegan peanut milk by the glassful alongside a slice of chocolate cake, or add it to smoothies.

There are so many vegan milks on the market, but have you ever had peanut milk?
It may be surprising given how popular peanuts are, but peanut milk is relatively uncommon in many parts of the world. However, if you’re a peanut lover, this is one you’ve got to try!
Made with roasted peanuts, it has a more pronounced nutty flavor than some other nut milks (like almond milk or walnut milk).
It really pops with the taste of peanuts and is wonderfully drinkable. It’s best served ice cold.
Peanut milk is simple to prepare at home with just 4 pantry-friendly staples, and very little hands-on work.
Make a batch, and prepare to be wowed.
In this post:
Ingredients
Here are the ingredients you will need to make this recipe.

Peanuts: For this DIY peanut milk recipe, choose shelled, roasted, and unsalted peanuts.
Unsalted, roasted peanuts are readily available in most supermarkets. Look for them with other nuts in the center aisles of your grocery store or online. I buy mine at Trader Joe’s.
Water: To make peanut milk, you’ll need water to soak the peanuts until softened. Then you’ll drain them off (discarding the water), and add fresh, clean water to blend into nut milk.
Agave syrup: Although it isn’t strictly necessary, a touch of sweetness makes peanut milk even more delicious. Agave syrup is convenient to keep on hand. However, if you’d prefer, pure maple syrup, date syrup, or a fresh date also works well. (Or if you’d rather not use a sweetener, simply leave it out.)
Salt: A pinch of salt adds balance and makes the flavors pop.
How to make peanut milk at home
This section shows how to make this recipe at a glance with process photos of the steps. For complete ingredient amounts & instructions, keep scrolling to the recipe card below.

1. Put roasted & unsalted peanuts in a bowl. Cover with water and soak peanuts for 4 hours or overnight to soften them.
In a rush? Pour hot water over the peanuts and soak them for 15 to 30 minutes, or microwave them until warm before soaking. This speeds up the process while still giving you a smooth result!
Once you’re ready to make peanut milk, drain the nuts using a fine mesh sieve.
2. Add the drained peanuts to a high-speed blender. Then add clean, fresh water, agave syrup, and salt.
3. Blend 60 to 90 seconds, until completely smooth. (You’ll know it’s ready when you don’t hear any cracking noises in the blender.)
4. Put a nut milk bag or double-lined cheesecloth over a tall jar. Slowly pour the peanut milk through it. Then lightly squeeze the bag/cloth to get out all of the liquid, leaving the peanut pulp behind.

You can add an airtight lid to store the peanut milk in the jar, or transfer it to a smaller glass milk bottle.
Store peanut milk in the refrigerator. It gets even creamier as it chills.
Make it your own

Make this dairy-free peanut milk your own by varying the ingredients.
Vary the amount of peanuts or water
If you’d like a thicker peanut milk, either increase the amount of peanuts, or decrease the amount of water.
Vary the sweetener or amounts
Agave syrup can be replaced with maple syrup, date syrup, or a fresh date.
If you’d like sweeter peanut milk, increase the amount of sweetener. If you’d like it to be less sweet, use less sweetener or omit it completely.
Add vanilla or seasonings
I think peanut milk is best when the peanut flavor gets to shine. So I don’t like to add vanilla extract. However, if you do, add ⅛ to ¼ teaspoon, or until it reaches your preferred flavor.
(When adding vanilla extract, be careful to start small. It’s easy to go overboard.)
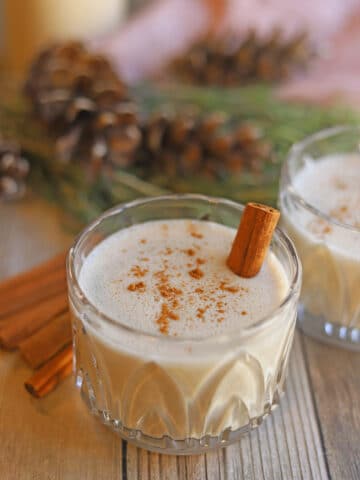
To personalize the flavor even more, add a sprinkling of cinnamon, or for chocolate peanut milk, add a Tablespoon of cocoa powder along with the other blender ingredients. (If you’re making chocolate peanut milk, you may want to add more sweetener as well.)
Serving ideas
This vegan peanut milk recipe is super tasty on its own by the glassful.
Serve it alongside a slice of chocolate cake to play up the tasty combination of peanut butter + chocolate. (I have a chocolate cake recipe in my book, Living Vegan, that would be amazing here!)
Peanut milk also works well with anything banana flavored like banana bread cookies or grilled banana splits.
Or serve homemade peanut milk with frozen grapes, toast with jelly, or a vegan jelly doughnut for a taste reminiscent of peanut butter and jelly.
In addition, peanut milk can be added to other recipes. Here are some ways to use it:
- Use it as the vegan milk in chocolate banana nice cream
- Use it as the non-dairy milk in a creamy peanut butter banana smoothie or chocolate peanut butter smoothie
- Add a splash to finish peanut butter banana oatmeal
- Use it as the base of chia pudding
Storage instructions
Store homemade peanut milk in an airtight jar or container in the fridge.
Homemade peanut milk lasts about four days. That’s why I like to make a smaller batch (like this 2-cup recipe).
Because it doesn’t include any gums or emulsifiers, you may notice some separation in the milk after storing in the fridge. If that happens, just give the bottle a little shake to reincorporate the water.
FAQ
Peanut milk has a lightly nutty, smooth, creamy flavor that’s reminiscent of peanut butter.
No, I don’t recommend it. Salted peanuts will make the non-dairy milk much too salty. It’s better to use unsalted peanuts & then add a tiny amount of salt to heighten the flavors.
Yes. Before straining, the pulp of the nuts can add a little bit of grittiness that isn’t pleasant to gulp. So for completely smooth, drinkable peanut milk, strain it with a nut milk bag or cheesecloth for optimal creaminess.
It depends on your particular machine. Nuts can be challenging for a standard blender to break down completely. If you don’t have a high-speed blender, I definitely recommend soaking a longer amount of time to get the peanuts as soft as possible before blending.
The more blended the nuts are, the creamier & more flavorful your peanut milk will be.
More peanut recipes
Here are more recipes with peanuts that I think you’ll enjoy:

If you try this recipe and love it, let me know! Leave a comment and ⭐⭐⭐⭐⭐ rating in the comment section below. It truly makes my day and is such a help!
📖 Recipe

Creamy homemade peanut milk
Ingredients
- ½ cup peanuts shelled, roasted, and unsalted
- 2 cups water + more for soaking
- ½ teaspoon agave syrup or date syrup or 1 pitted date
- ⅛ teaspoon salt
Instructions
- Pour roasted peanuts into a bowl. Cover them in water. Then put them into the refrigerator to soak for 4 hours or overnight. (Short on time? Pour hot water over them instead, and let them soak for 15 minutes to half an hour.) Once you're ready to make the peanut milk, drain the peanuts in a fine mesh strainer.
- Pour the drained peanuts into a high-speed blender along with two cups of clean, fresh water, agave syrup, and salt. Blend for a minute to 90 seconds, until the sounds of peanuts cracking can't be heard.
- Use a clean spoon to taste the peanut milk. If you like, add more sweetener to taste.
- Put a nut milk bag (or double-lined cheesecloth) into a large jar or pitcher. Fold the edges of the bag over the sides to secure it. Then slowly pour the peanut milk through the nut milk bag and into the jar or pitcher. Once it's three quarters full, use your hands to gently squeeze any additional milk from the bag into the jar.
- Cover the jar or pitcher with a lid, and store in the refrigerator for up to 4 days.


Robert B
Why roasted peanuts instead of raw? Raw are harder to find and a little more expensive, but I thought they would work better — and have less peanut taste.
Cadry Nelson
I use roasted peanuts for the exact reasons you said. Raw peanuts are harder for me to find, which can also be a deterrent for readers who want to make this recipe but can’t source raw peanuts. I also like how much of a rich, peanut taste milk made from roasted peanuts has. However, if you have access to raw peanuts and prefer a milder flavor, choose raw instead. I hope you enjoy the recipe if you try it!